Avatar Profile (Expression Blend Shape Map)
Map VRM standard expression names to avatar-specific expression blend shapes
VRC Avatar Viewer automatically assigns expression data received via the VMC protocol (VRM-standard expression names such as Joy / A / Blink) to the avatar's expression blend shapes to drive them. For VRChat avatars, the lip sync specified in the Avatar Descriptor is automatically assigned, so the mouth moves. However, by creating an avatar profile dedicated to your avatar, you can specify the mappings in detail yourself.
An avatar profile is a text file in .toml format, with one file per avatar. It is applied simply by selecting it from the streaming mode panel, and you can switch it at any time, even while receiving VMC.
- This guide assumes the basic operation of VMC reception (Motion Capture Integration). Please first confirm that your avatar is moving
- VRM avatars (.vrm) have their own blend shape definitions, so this feature is mainly intended for VRChat avatars in
.avabformat
Profile File Location
Profiles are placed in the avatar_profiles folder, located in the same folder as the Avatar Viewer itself.
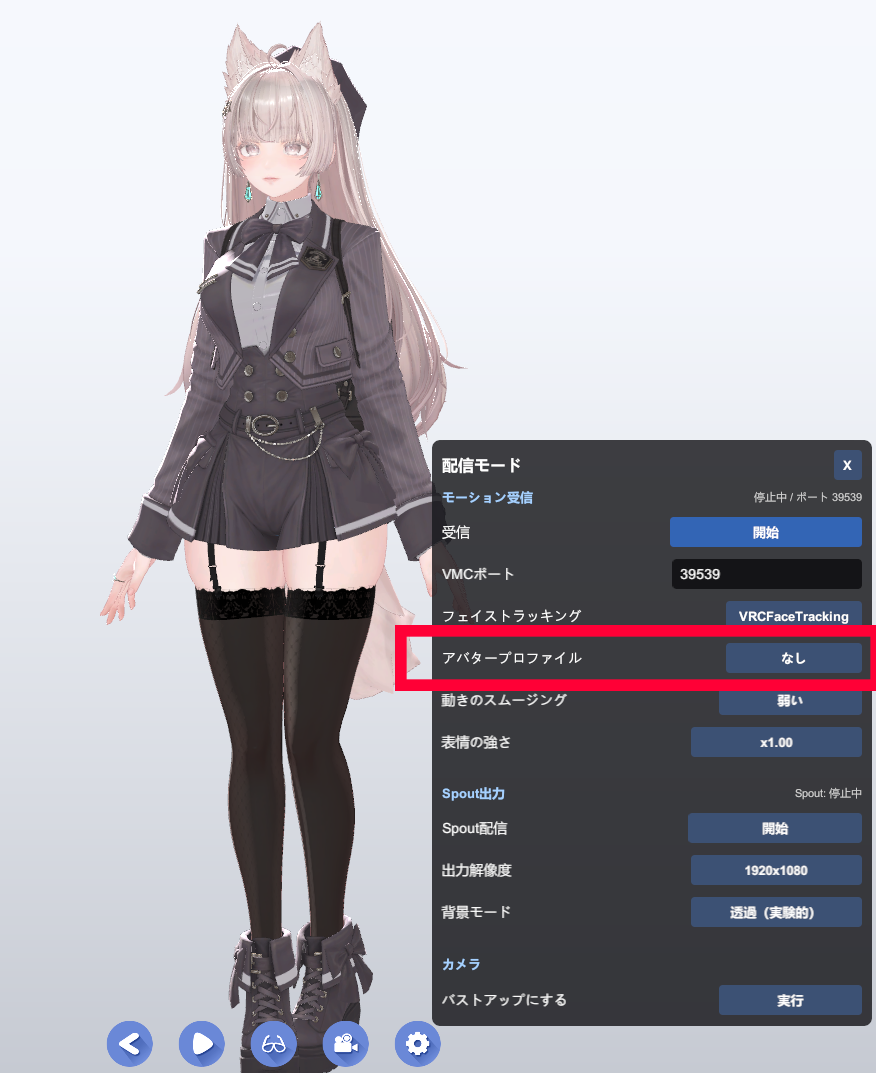
- Launch the Avatar Viewer and click the Streaming Mode button on the toolbar
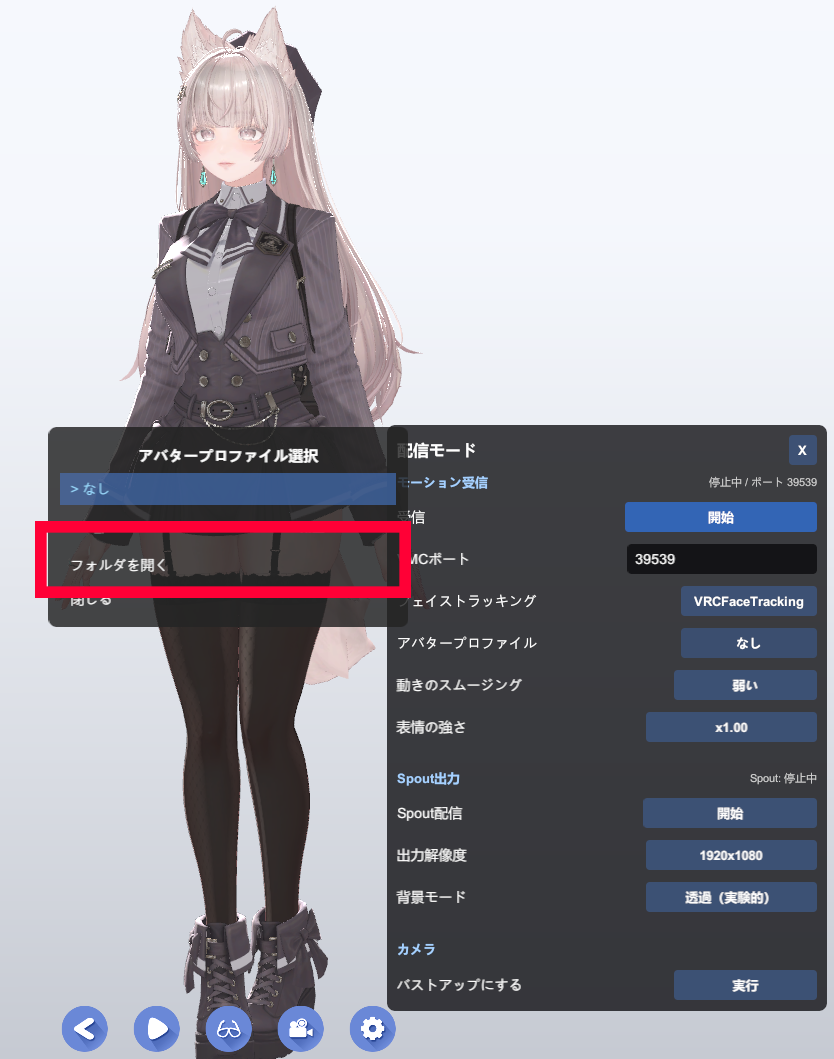
- Click Open Folder in the "Avatar Profile" section, and the
avatar_profilesfolder will open in Explorer - Copy
sample.tomlin the folder and rename it to your avatar's name (e.g.,my_avatar.toml) - Open and edit it in a text editor (Notepad, VS Code, etc.)
sample.tomlis not displayed in the profile list. You can leave it as-is for reference- The file extension must be
.toml - The file name (excluding the extension) is up to you. The viewer uses the value of the
namefield as the display name
How to Write a TOML File
The minimal configuration is just the name at the top of the file, followed by as many [[expressions]] blocks as you need.
name = "My Avatar"

[[expressions]]
source   = "Joy"
target   = "face_happy"
renderer = "Body"

[[expressions]]
source   = "Blink"
target   = "eye_close"
renderer = "Body"

[[expressions]]
source   = "A"
target   = "mouth_a"
renderer = "Body"
The meaning of each field is as follows.
| Field | Description | Default |
|---|---|---|
source |
Expression name on the receiving side (Joy / A / Blink, etc.) | Required |
target |
Expression blend shape name on the avatar | Required |
renderer |
GameObject name of the SkinnedMeshRenderer that holds the expression blend shape | Auto-detect |
min_weight |
Lower bound of the expression blend shape weight (0–100) | 0 |
max_weight |
Upper bound of the expression blend shape weight (0–100) | 100 |
- By writing multiple
[[expressions]]blocks for the samesource, you can drive multiple expression blend shapes simultaneously with one expression - Lines starting with
#are comments. You can write whatever you like
List of Available source Names
The expression names that can be specified for source are the following categories conforming to the VRM standard. They are case-insensitive.
| Category | source name |
|---|---|
| Expressions | Joy / Angry / Sorrow / Fun / Surprised / neutral |
| Lip sync | A / I / U / E / O |
| Blink | Blink / Blink_L / Blink_R |
| Gaze | LookUp / LookDown / LookLeft / LookRight |
| Brows | browDownLeft / browDownRight / browInnerUp / browOuterUpLeft / browOuterUpRight |
- Expression names not listed here (e.g., the detailed mouth corner, cheek, and tongue parameters of VRCFaceTracking) cannot be handled by avatar profiles. If you want to drive those, switch "Face Tracking" in streaming mode to VRCFaceTracking and handle them on the avatar's FX layer
How to Find target (Expression Blend Shape Name)
For target, write the exact name of the expression blend shape that actually exists on the avatar. Names vary greatly depending on the author and naming conventions, so prior verification is required.
Method A: Check in Unity (before export)
- Open the avatar in Unity
- Select the face mesh from the hierarchy (often named
BodyorFace) - Expand SkinnedMeshRenderer → BlendShapes in the Inspector
- The names listed there can be used directly as
target. The name of the selected GameObject is used asrenderer
Method B: Check the Viewer's logs
When the target name or renderer name is wrong, the viewer outputs warning logs. It's also practical to create a profile with placeholder names, load it, and correct the names while watching the logs.
Adjusting Intensity with min_weight / max_weight
The strength of the received expression (0.0–1.0) is linearly interpolated between min_weight and max_weight and reflected in the expression blend shape. The defaults are 0 to 100 (i.e., moves up to 100%).
# Make the smile a bit more subtle
[[expressions]]
source     = "Joy"
target     = "face_happy"
renderer   = "Body"
max_weight = 60

# Always keep mouth corners slightly raised (apply a baseline offset)
[[expressions]]
source     = "neutral"
target     = "face_smile_slight"
renderer   = "Body"
min_weight = 20
max_weight = 40- Even when the receiving side is 0, the
min_weightvalue is applied, so it can be used as a constant "baseline offset" - When expressions are too wild, lowering
max_weightfirst is the most effective
Notes When Omitting renderer
If renderer is not specified, all SkinnedMeshRenderers in the avatar are scanned in order, and the change is applied to the first one that has the specified target expression blend shape.
This behavior is convenient, but if other meshes such as clothing or hair also have an expression blend shape with the same name, an unintended mesh may move. It is generally recommended to specify renderer explicitly.
Selecting and Applying in the Viewer
- Display the avatar in the Avatar Viewer
- Open Streaming Mode from the toolbar
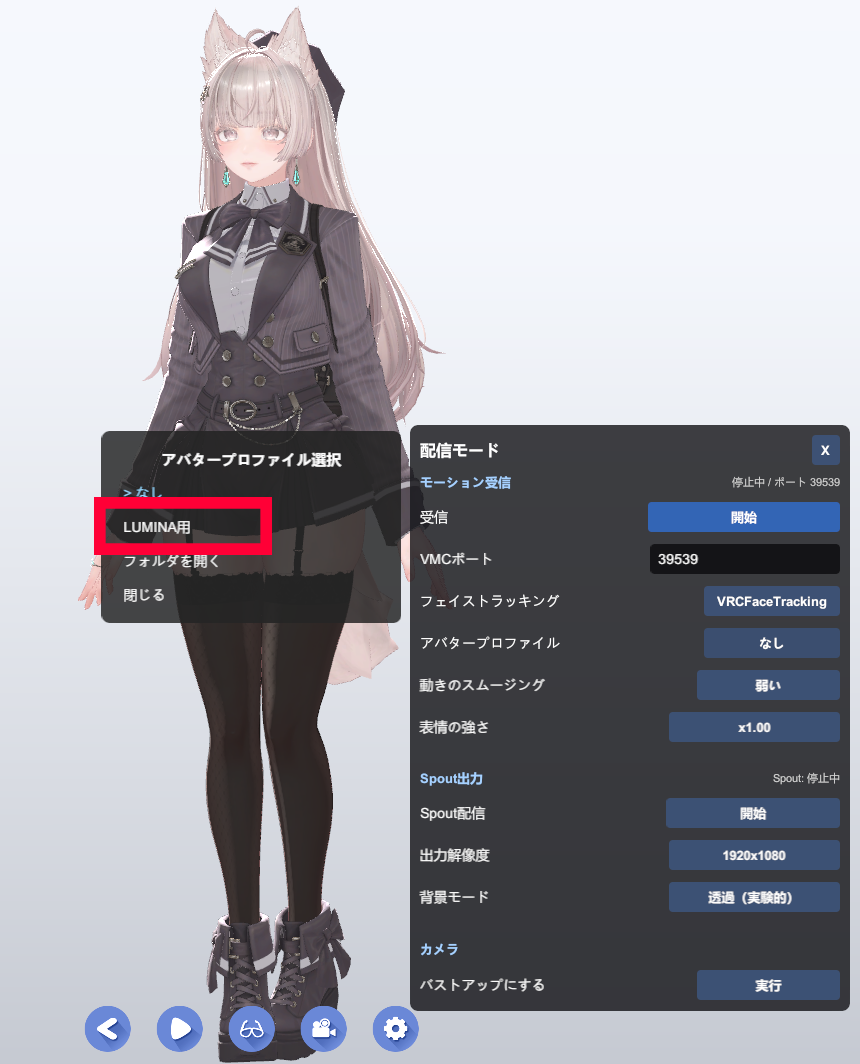
- Click the selection button under "Avatar Profile" and choose the profile you want to use from the list
- Turn on VMC reception, and the mapped expression blend shapes will move
- If you switch profiles while receiving VMC, they are automatically rebound. There's no need to stop or restart
- Selecting None reverts to the conventional automatic assignment without using a profile
- After editing a file, switch to another profile once and then back to apply the changes
Troubleshooting
-
Nothing is reflected at all
The main causes are misspelled
source, a non-existent expression blend shape name intarget, or a wrongrenderername. Use Method A in Step 4 to verify the correct names -
The wrong mesh moves
If
rendereris omitted, it may be hitting another mesh that has an expression blend shape with the same name. Specifyrendererexplicitly -
Expressions are too strong or too weak
Adjust the upper bound with
max_weightand the constant offset withmin_weight -
I want to drive multiple expression blend shapes from a single expression
Just place multiple
[[expressions]]blocks with the samesource, and they will move simultaneously -
It doesn't appear in the profile list
Check that the extension is
.tomland that the file is placed directly under theavatar_profilesfolder. Files namedsample.tomlare excluded from the list